
Ahh the holidays. A time for Ugly Sweater parties and Christmas lights and sweet treats. If you're looking for something special to take to a holiday party, might I suggest these little gems? I introduce you to the Spice Cake Cake Pop!
I consider myself a bit of a cake pop pro at this point. My near perfection of the craft is a result of hours of baking, crumbling, mashing and scooping, followed by more hours of rolling, sticking, dipping, drizzling, and sprinkling. Cake pops galore... for my wedding, my old boss's wedding, bridal showers, parties, holidays -- the list goes on! I believe the cake pop was originally invented by Bakerella.
Through my trials and tribulations in cake pop making, I have learned a few things that will make your life a hell of a lot easier if you decide to embark on this journey. I am not going to sugar coat this and tell you "Oh yeah, cake pops are a breeze to make, you'll be done in no time." They take time and patience and love. There are a lot of steps. They are all easy steps, but there are a lot of them.
Just trust me... in the end - it will be worth it. These little babies are delicious, AND absolute show stoppers. People love them and will be super impressed by your fancy little desserts on sticks. You'll be so POPular :) And you can make them in any flavor your little heart desires. Spice Cake is good for the holidays, but I've also made: Vanilla, Lemon, Strawberry, Pumpkin, Blueberry Muffin, Red Velvet, and PB&J. I've also been dying to try Mint Chocolate and Banana Bread versions - stay tuned!
I recently discovered that you can use paper straws as cake pop sticks which makes me excited for several reasons:
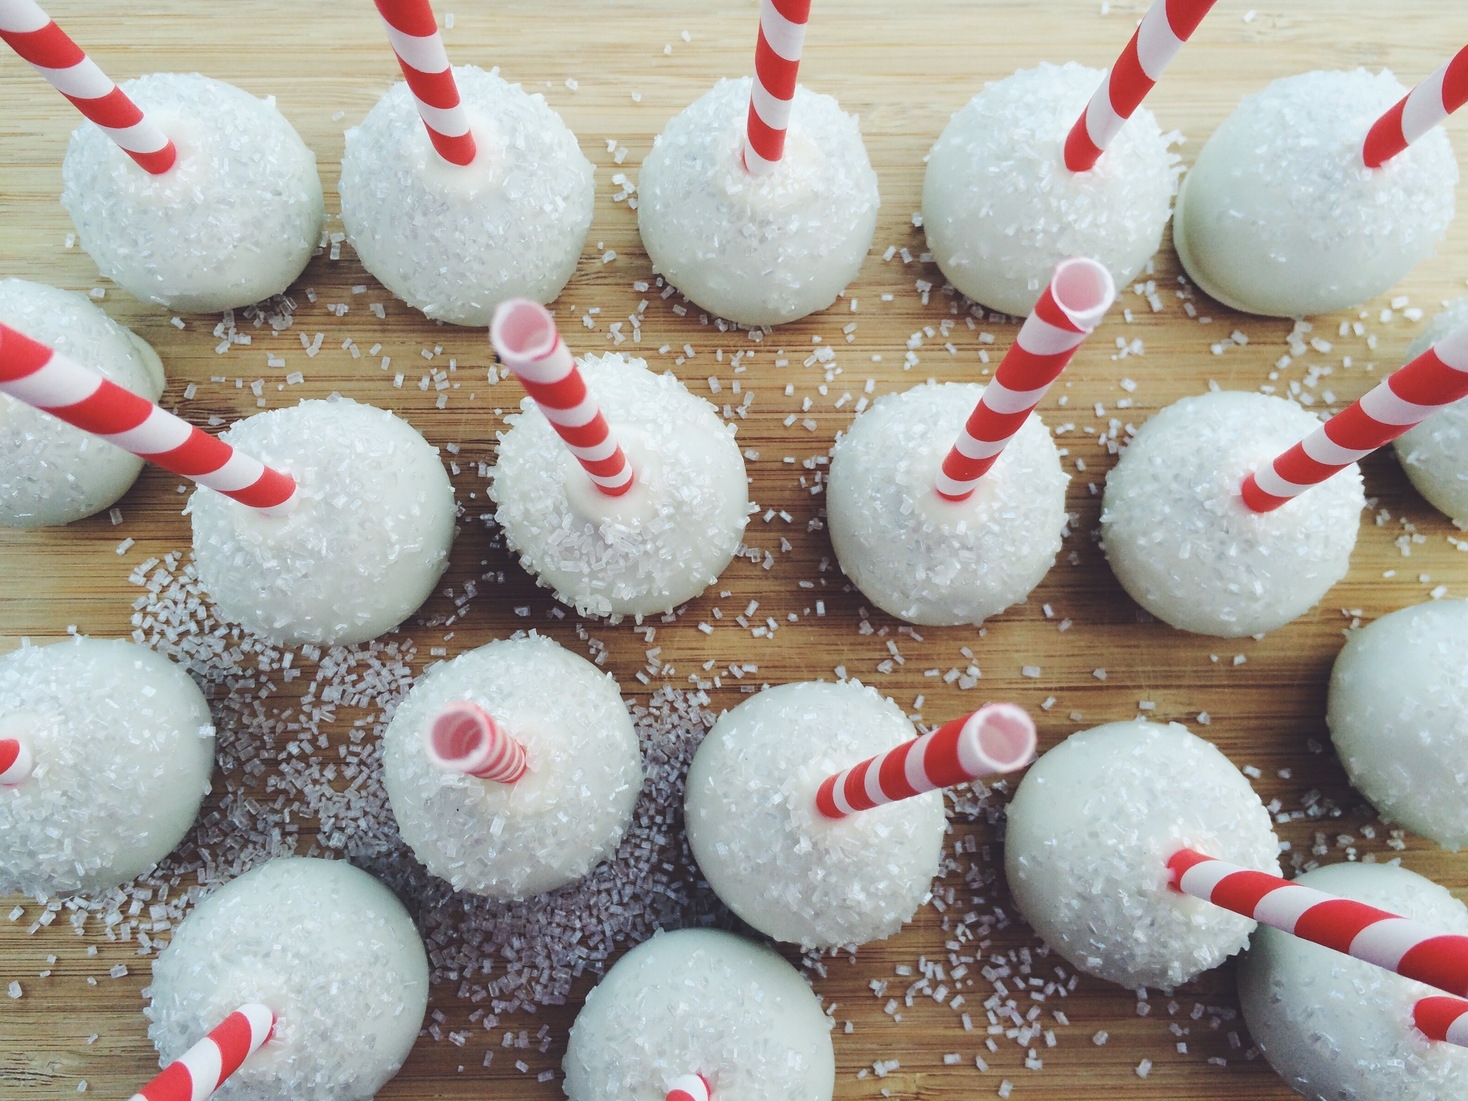
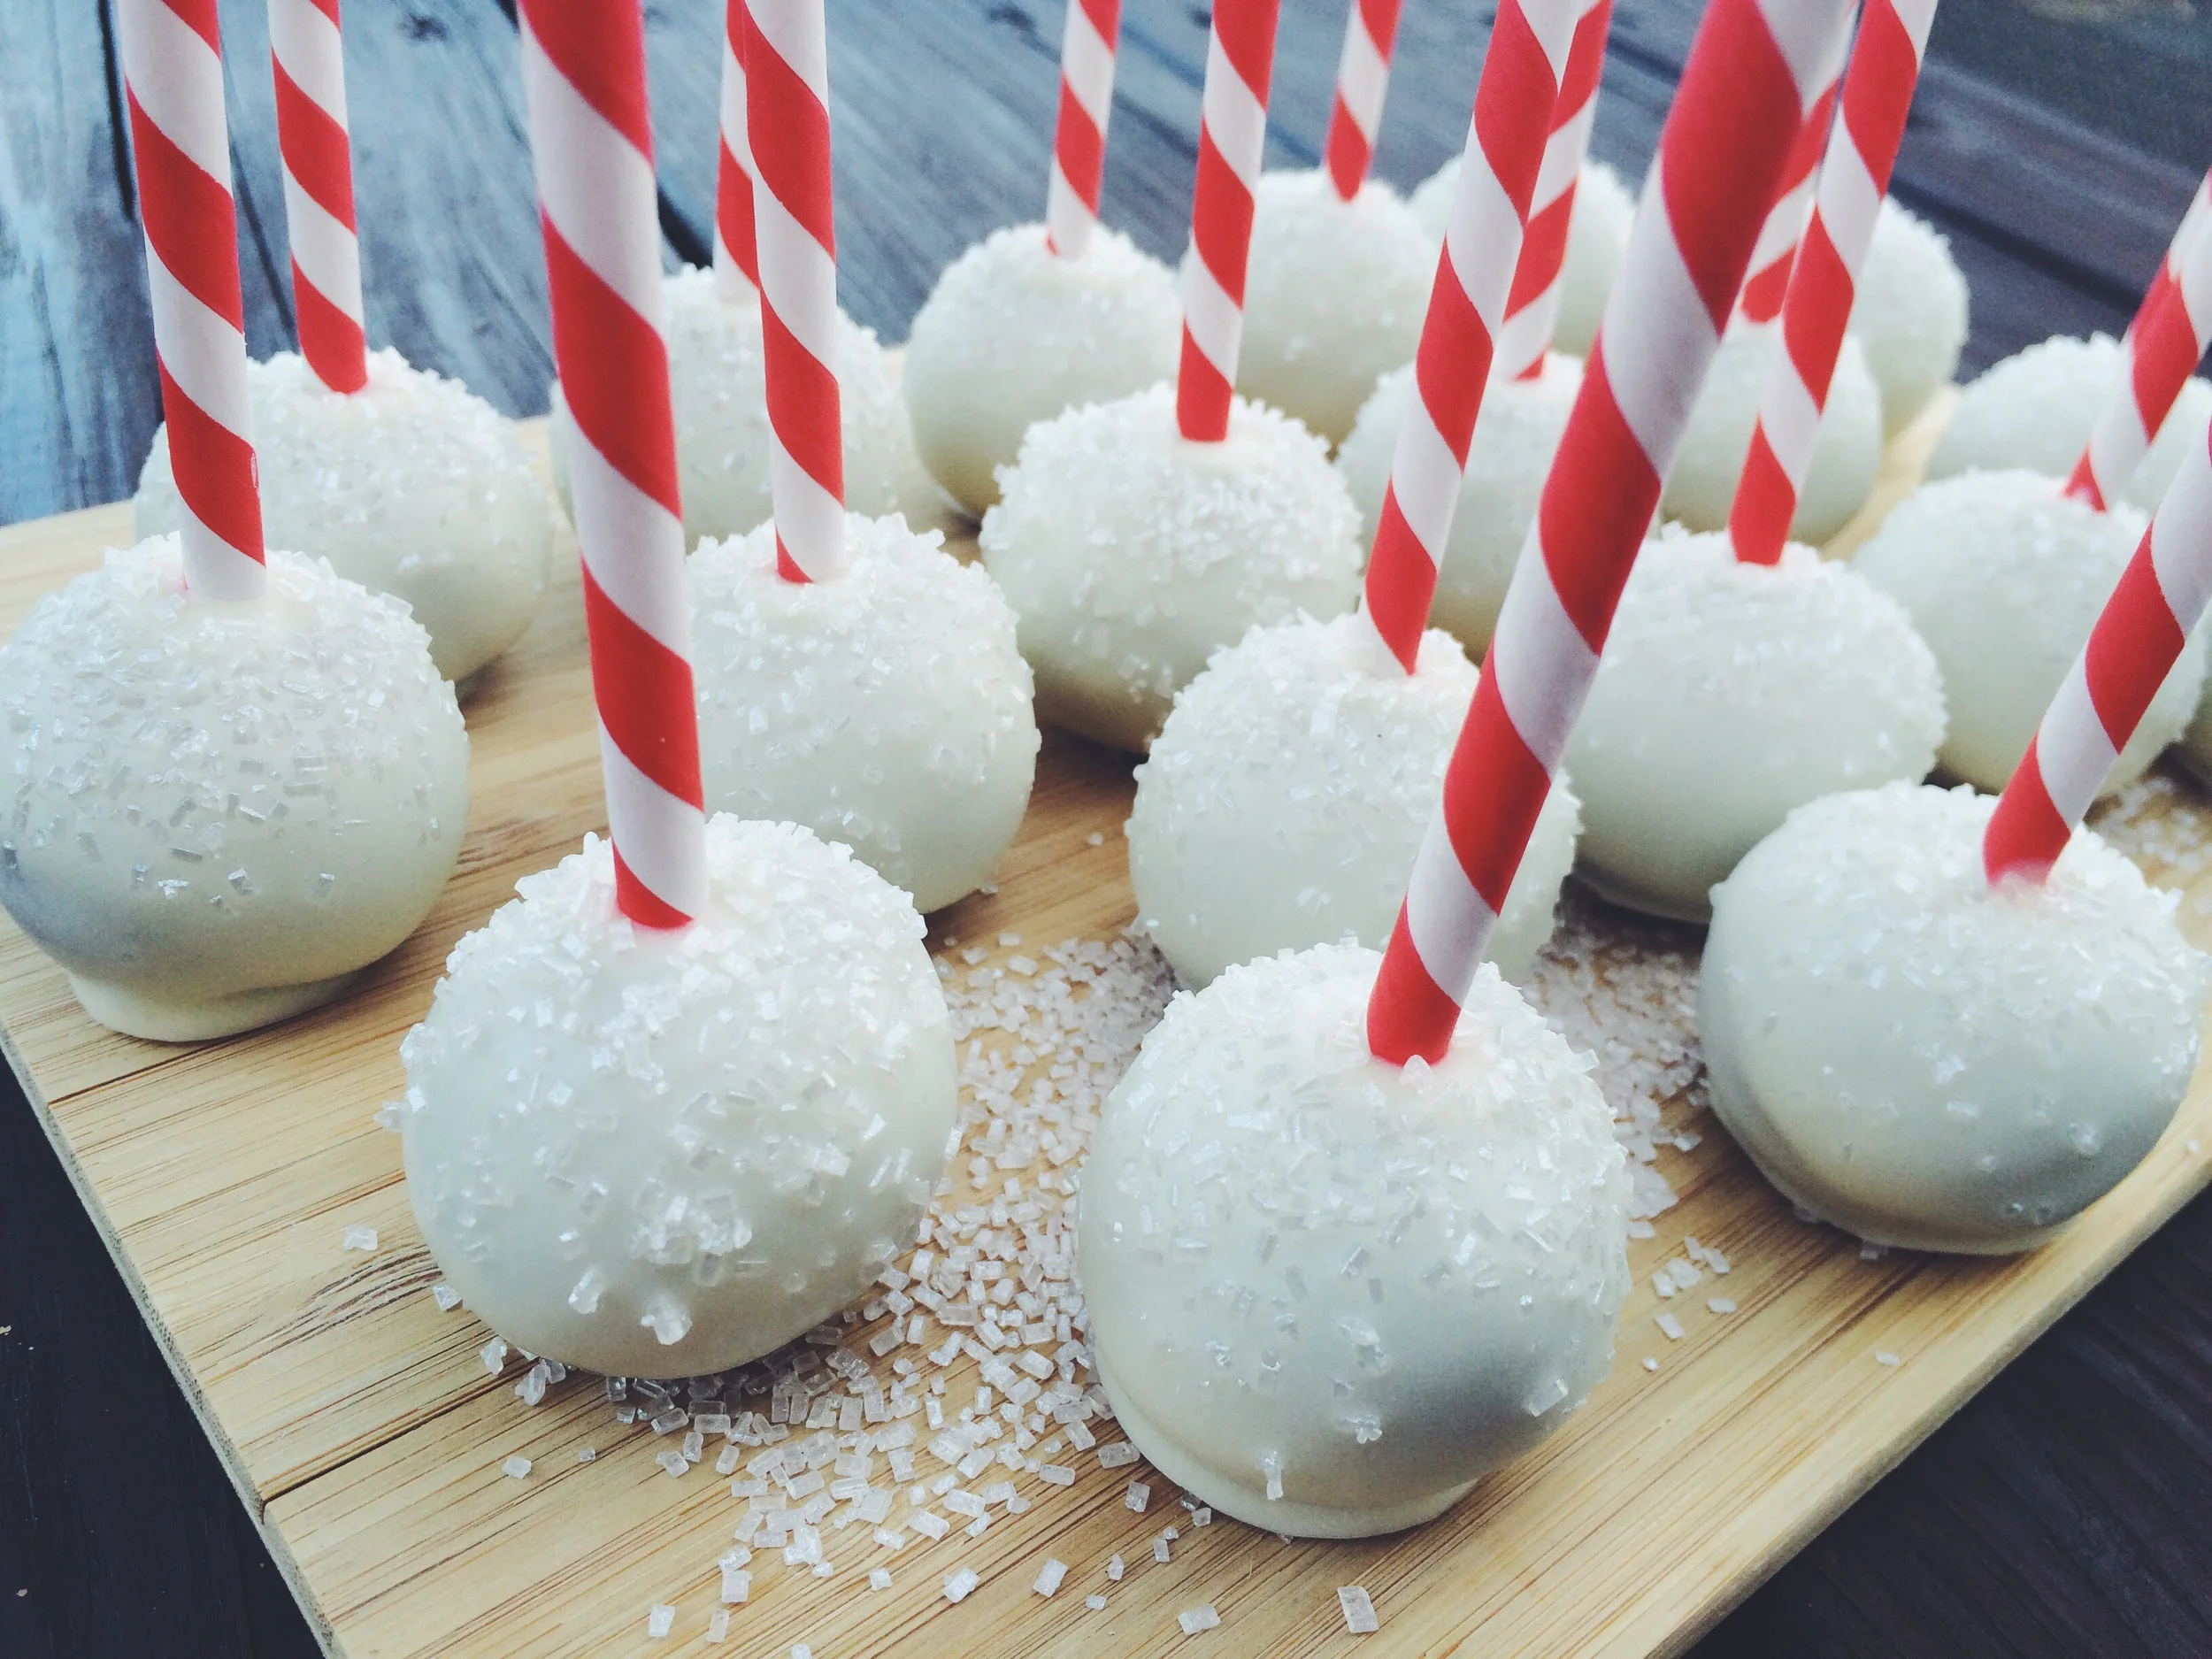
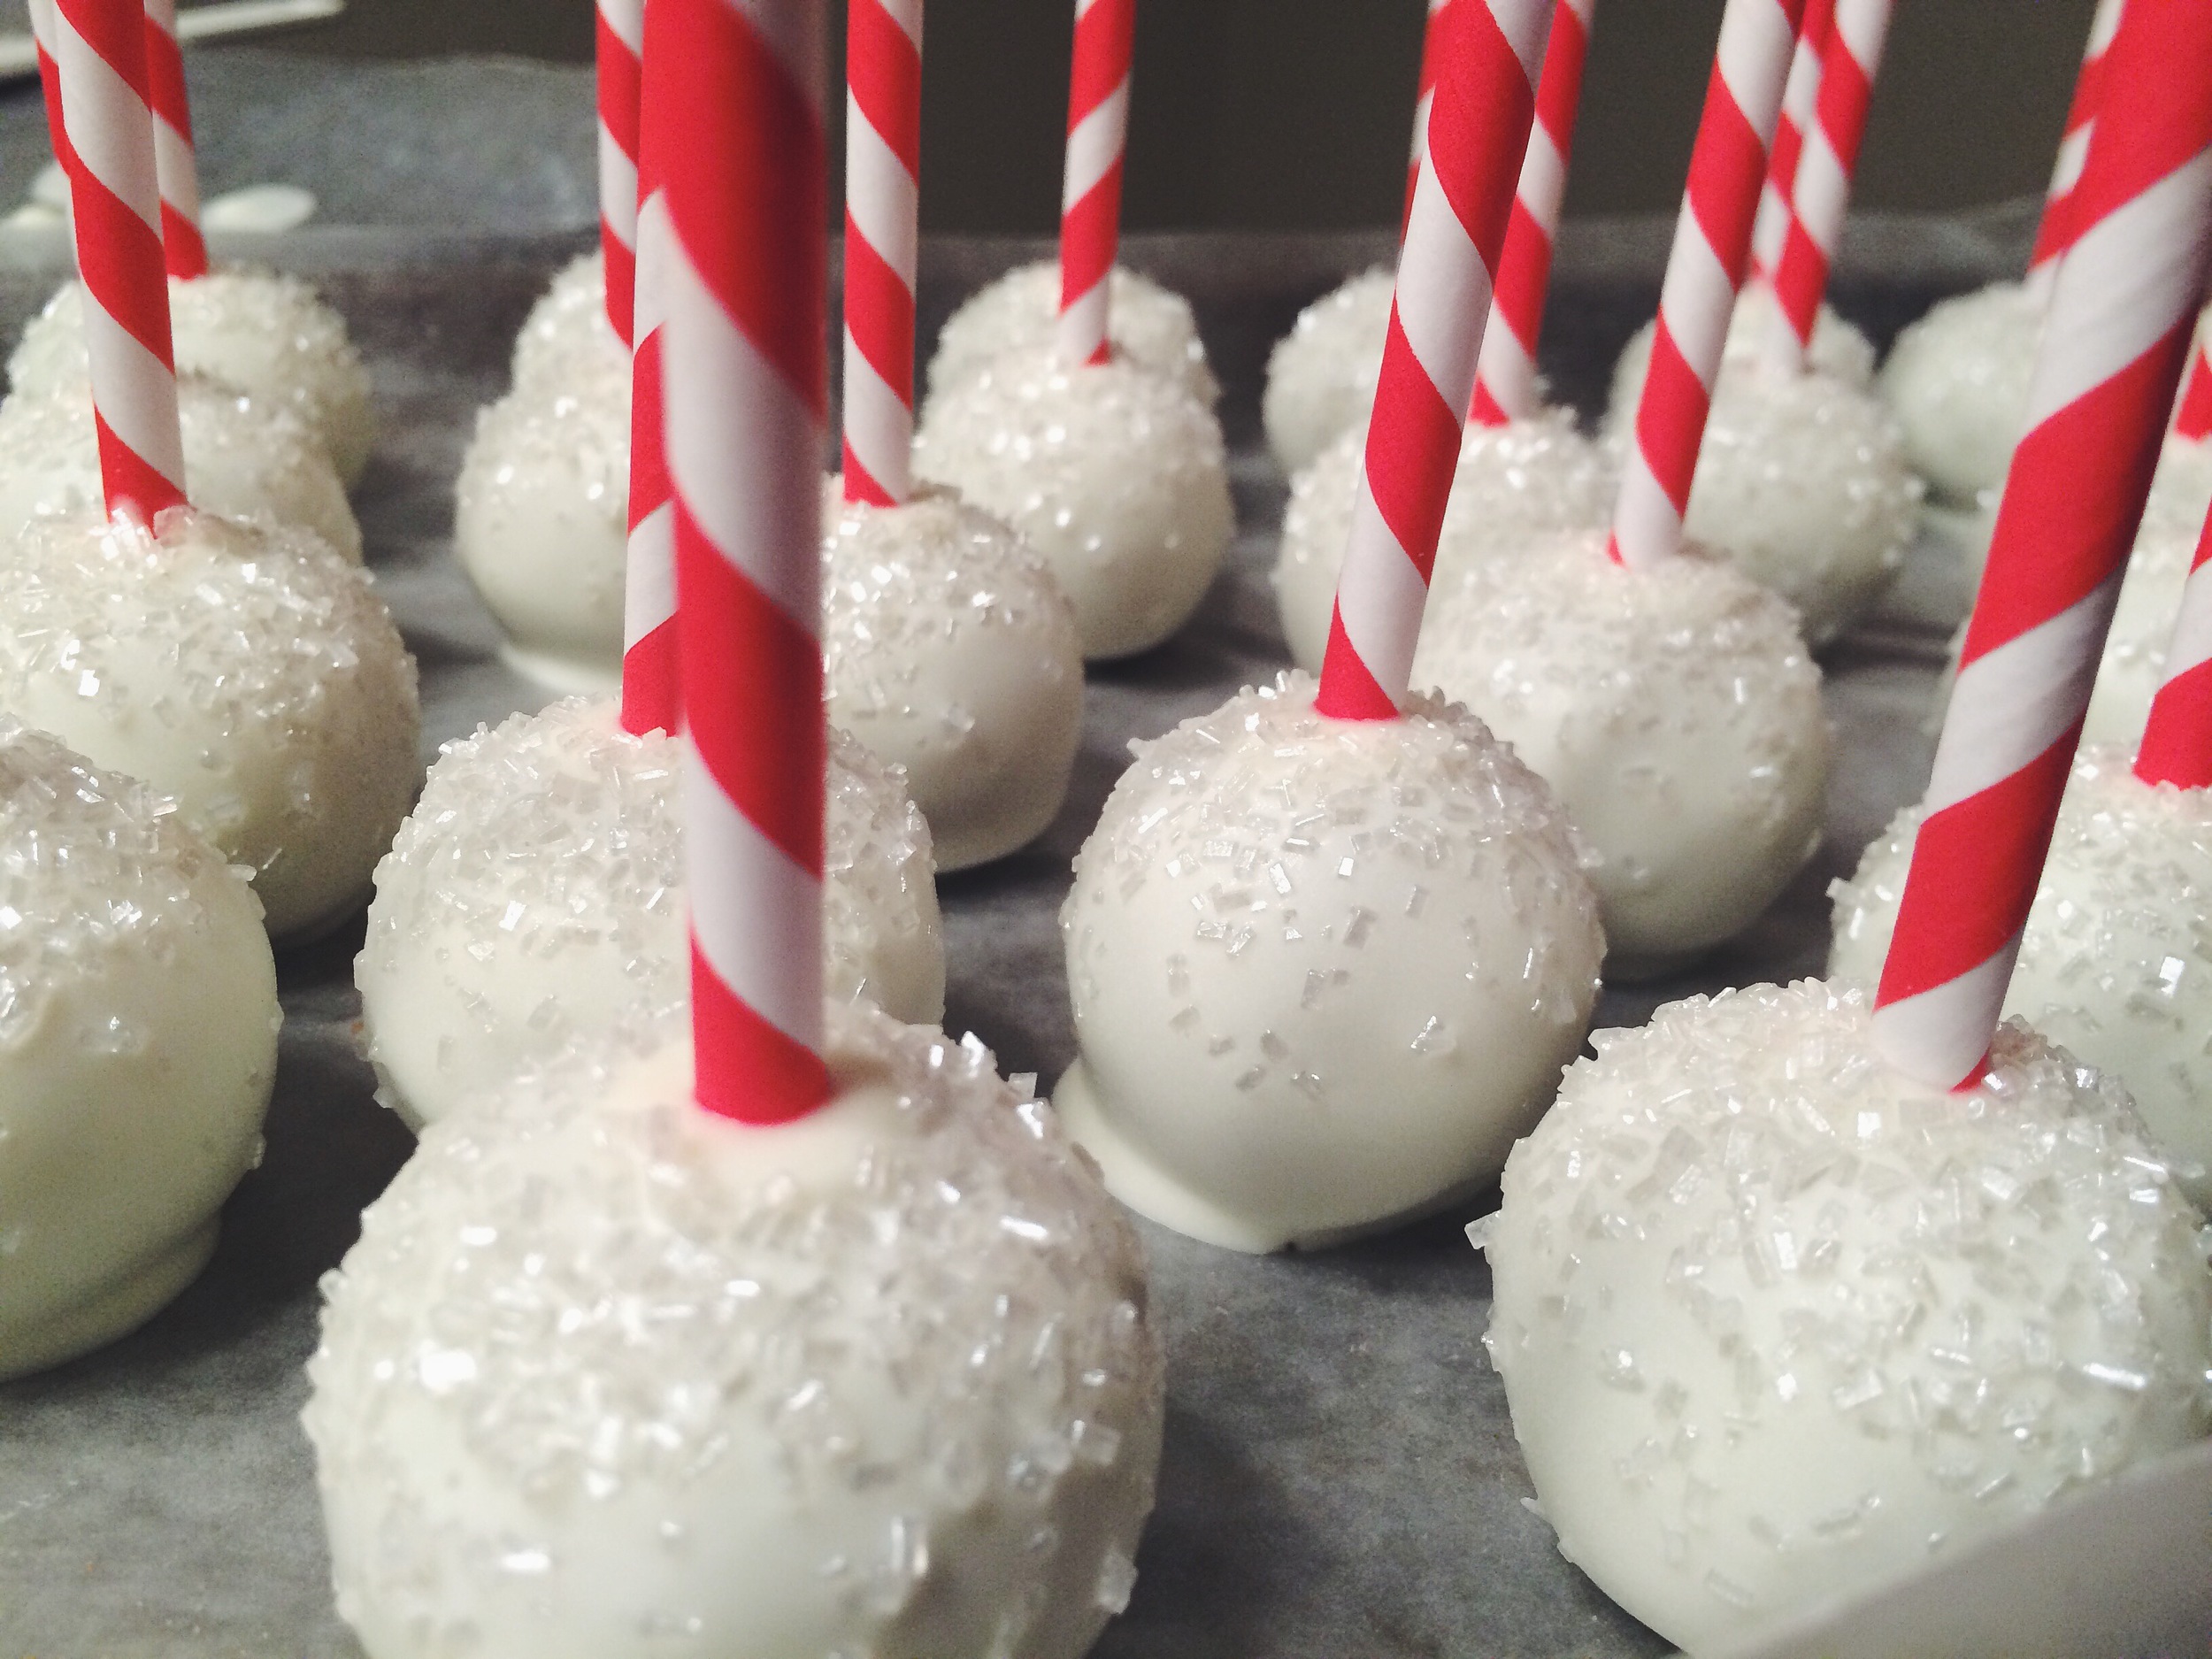
- Will you just look at how cute they are an imagine the possibilities of different designs for different occasions? Tell me these aren't perfect.
- They hold the cake ball better than your standard "lollipop" stick because the cake gets inside the stick and holds it in place.
- You can cut each straw in half so you get two for the price of one! And you can buy them from several places on the cheap -- HomeGoods, TJ Maxx, Amazon, Oriental Trading, etc.
I also found this lovely "edible glitter" at HomeGoods -- which works perfectly as "snow" on these holiday themed pops!
NOTE: For these cake pops, I made them top-down, so they can sit on their own. If you want to stand them up lollipop style, you should purchase a styrofoam board from your local craft store. This makes it possible for you to stick the pops right side up while you decorate them allow them to set, and you won't end up with flat topped pops!
Spice Cake Pops
Servings: 35-40 pops (varies depending on size of your pops and type of cake used)
Ingredients
1 Spice Cake Mix, prepared per package instructions (but without oil/butter)
1/2 of a 16oz tub of store-bought frosting (I used buttercream)
12oz bag white Wilton Candy Melts
1 Tbsp Crisco (or vegetable shortening)
Sprinkles of your choice
Instructions
Prepare the cake mix per package instructions.
TIP: As I mentioned above, leave out the oil/butter/whatever fat your cake mix calls for. Early on, I discovered that if the cake is too greasy, it tends to find ways to ooze out of the cake pop (usually around the stick) once they've been dipped. They really don't need the oil -- we're going to take this cake, mix it with icing, and dip it in chocolate. I think we can do without the oil.
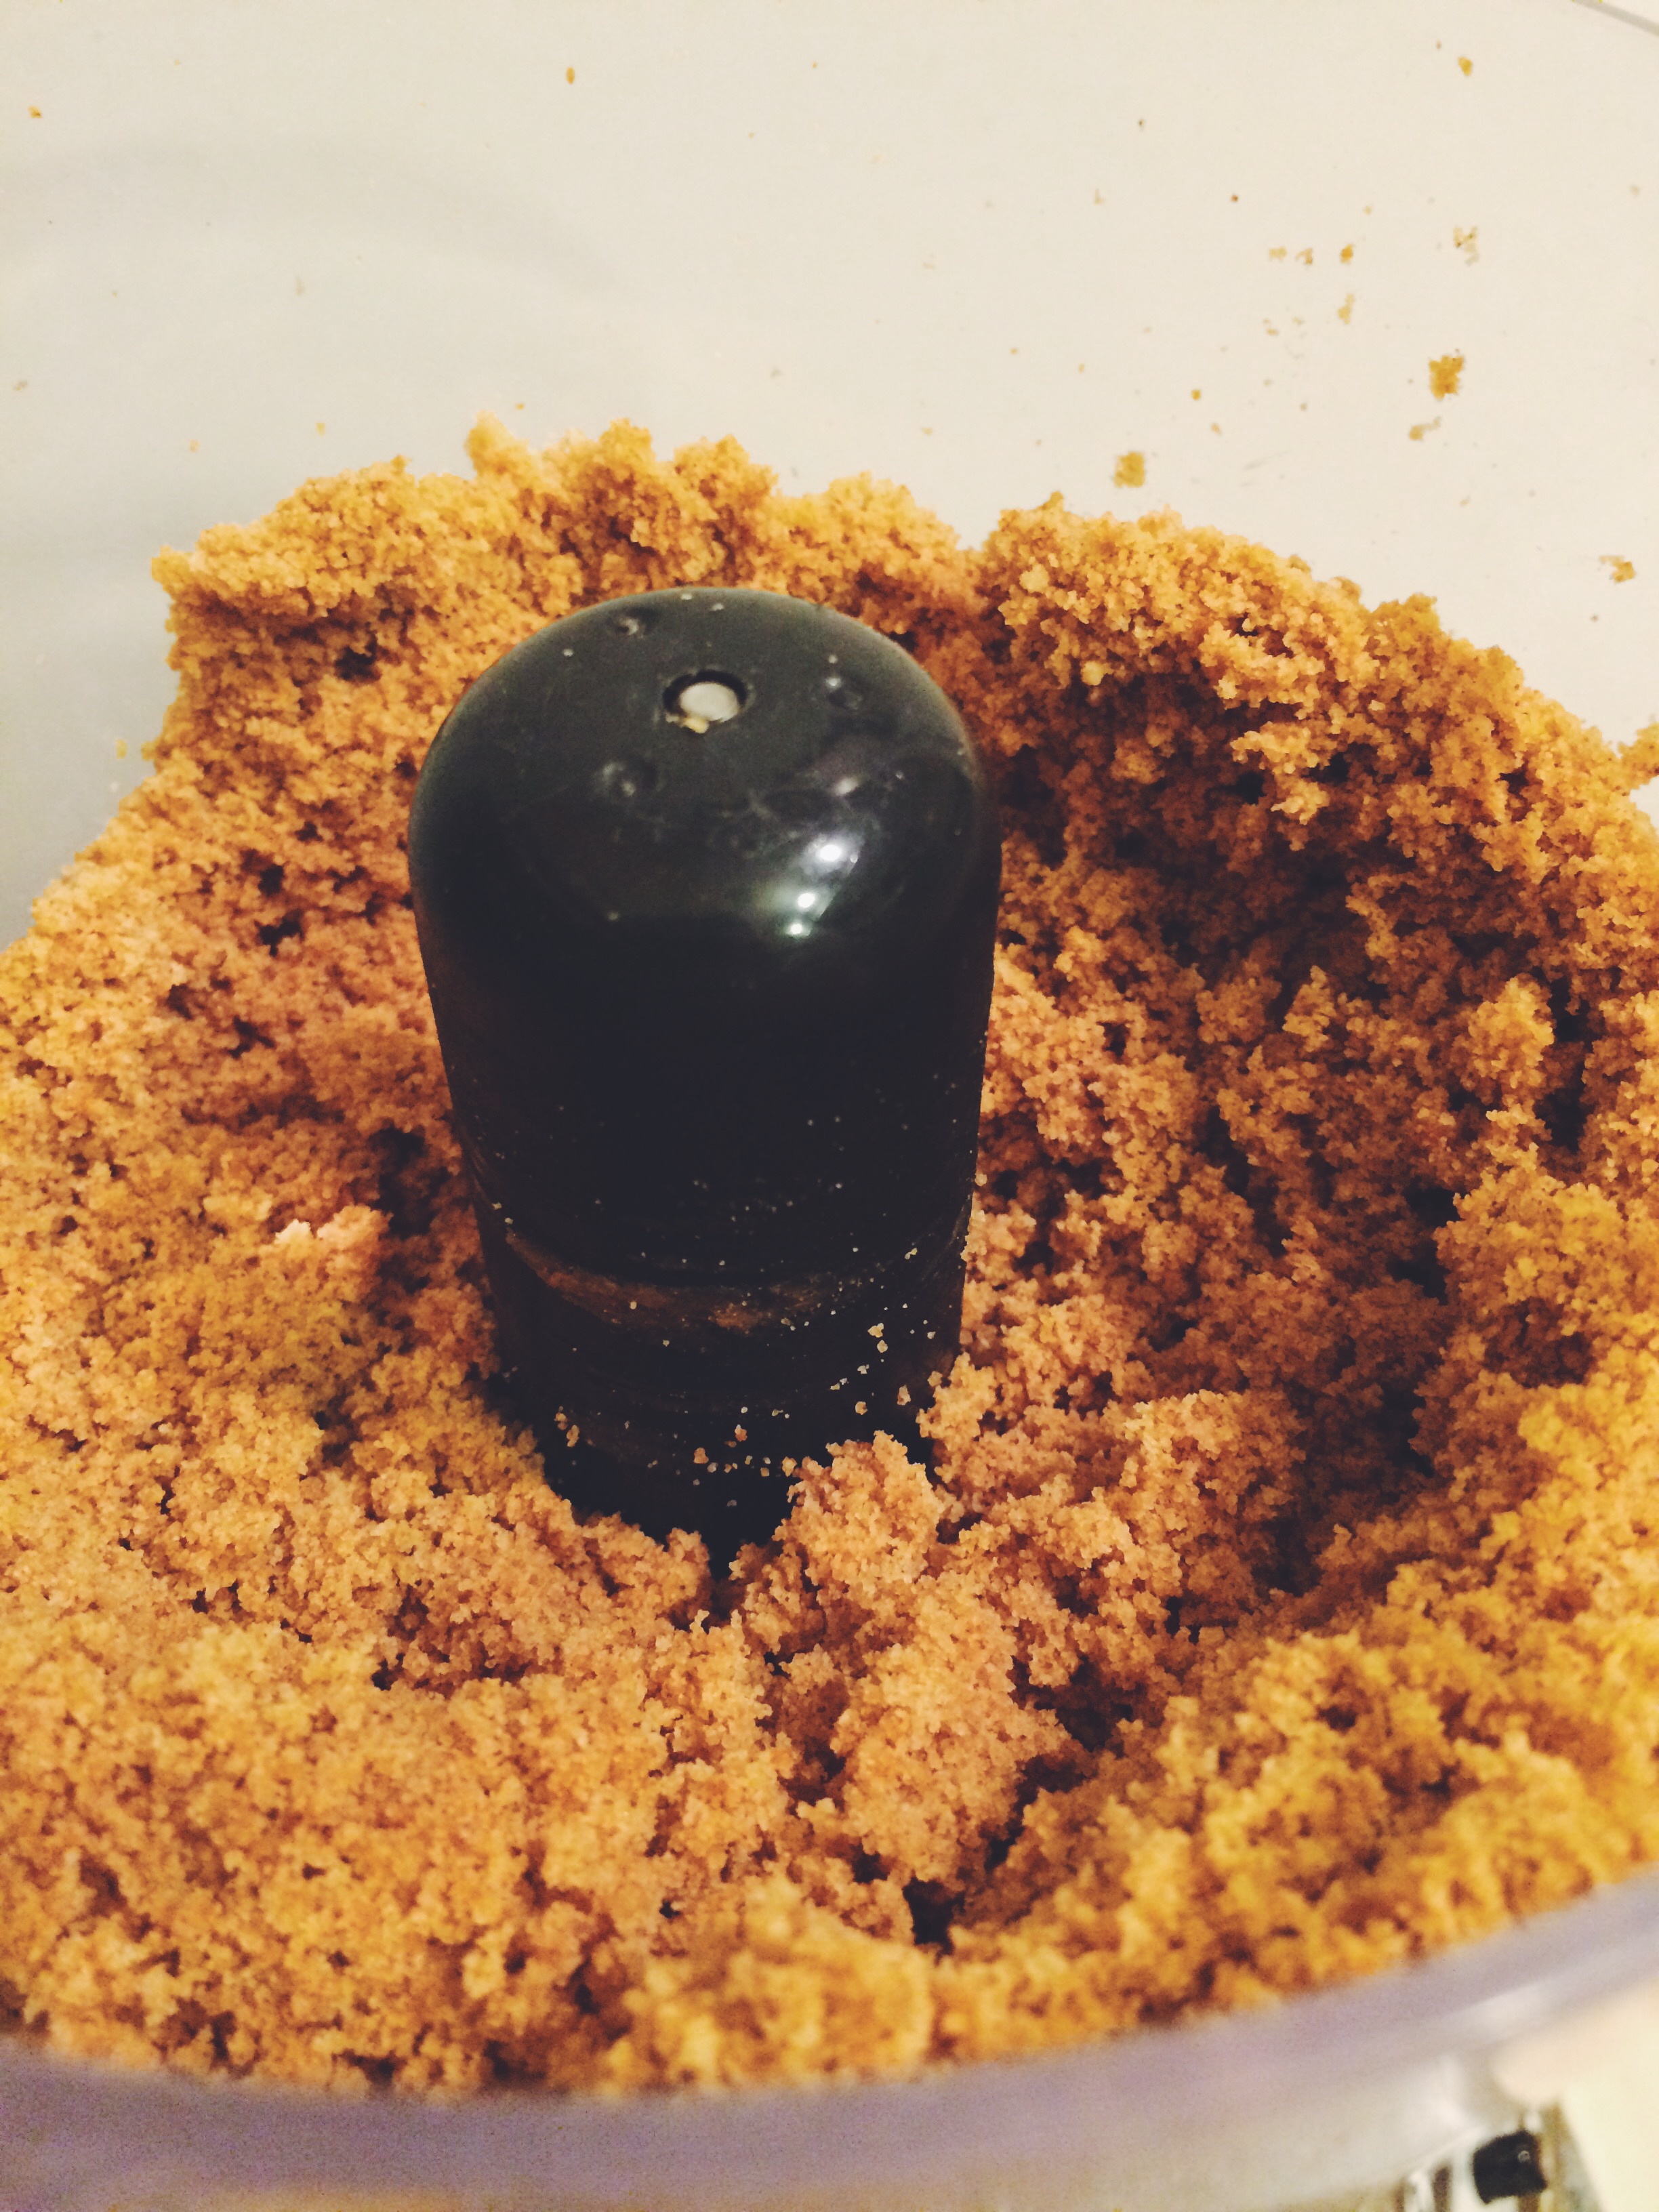
Allow the cake to cool completely, then cut it into small squares. Next up, grind up the cake. It works best to use a food processor for this step, but if you don't have one, you can crumble the cake with your fingers. Just try to get it to as fine a crumb as possible.


As you go, reserve the crumbs in a large bowl. If you're really feeling like you want to keep your dirty dishes to a minimum, 1/ bake your cake in a foil pan, 2/ as you take out the pieces of cake, put the crumbs back in the same pan, and 3/ use that same pan as your mixing bowl for the next step. This is an option for the ultra-lazy, which is sometimes me!
Scoop about half of the canned icing into the cake crumbs. Start with less, then add more as needed. You can't take it out but you can always add more! Now, take off your rings, roll up your sleeves, and get in there with your hands to mash everything together. It's hard to explain exactly what you're looking for, but the crumbs and frosting should come together into a "cookie dough" like texture. If it seems too dry, add more frosting until you get the right "dough" consistency. Too dry, and the pops will crumble. Too wet, and you'll have a hard time trying to get them to stay on a stick/dip them. Aim for "cookie dough" and you should be good.
TIP: The best method for this is to put the blob of frosting right in the middle of the bowl/crumbs. Push the crumbs from the outside into the center, and keep doing that so you don't end up with straight frosting all over your fingers.
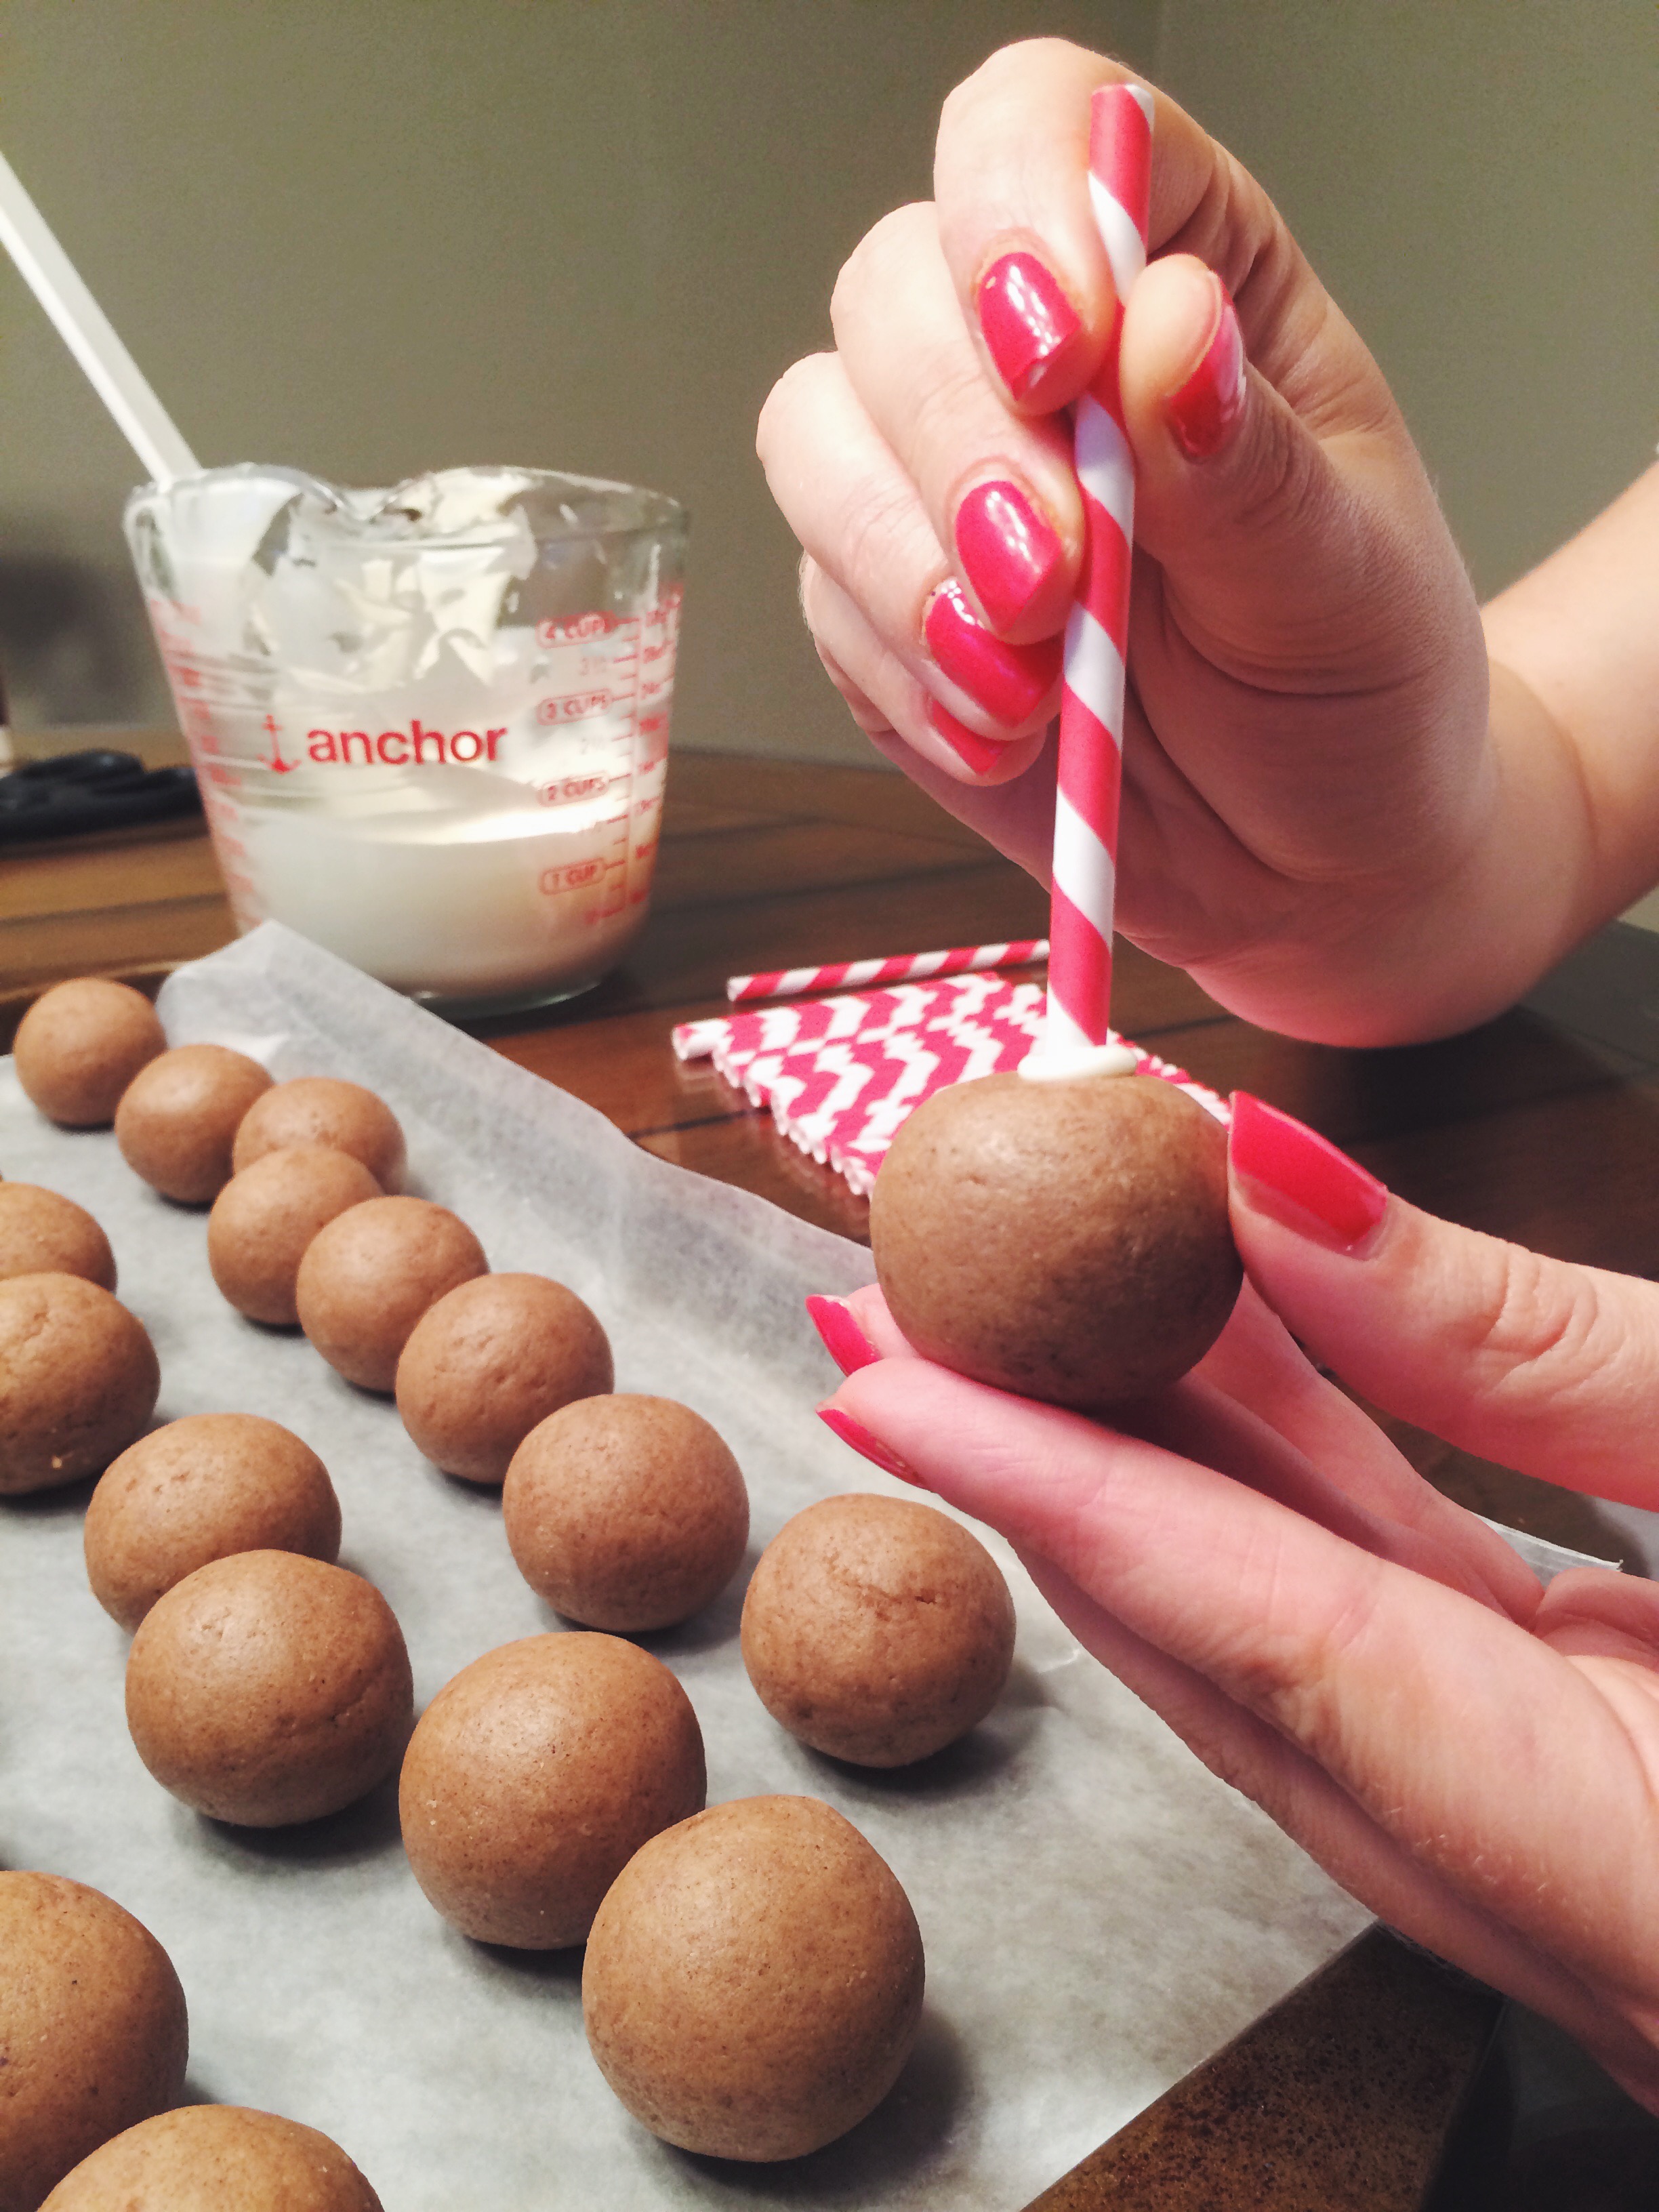
Next, use a cookie dough scooper to scoop all of the dough out onto a wax paper lined cookie sheet.


Roll each dough mound into as uniform a ball as possible. You will need to melt some of your chocolate for the next step. Add half of the bag of candy melts to a bowl or glass measuring cup. Microwave in 30 second increments, stirring in between, until the coating is melted and smooth.
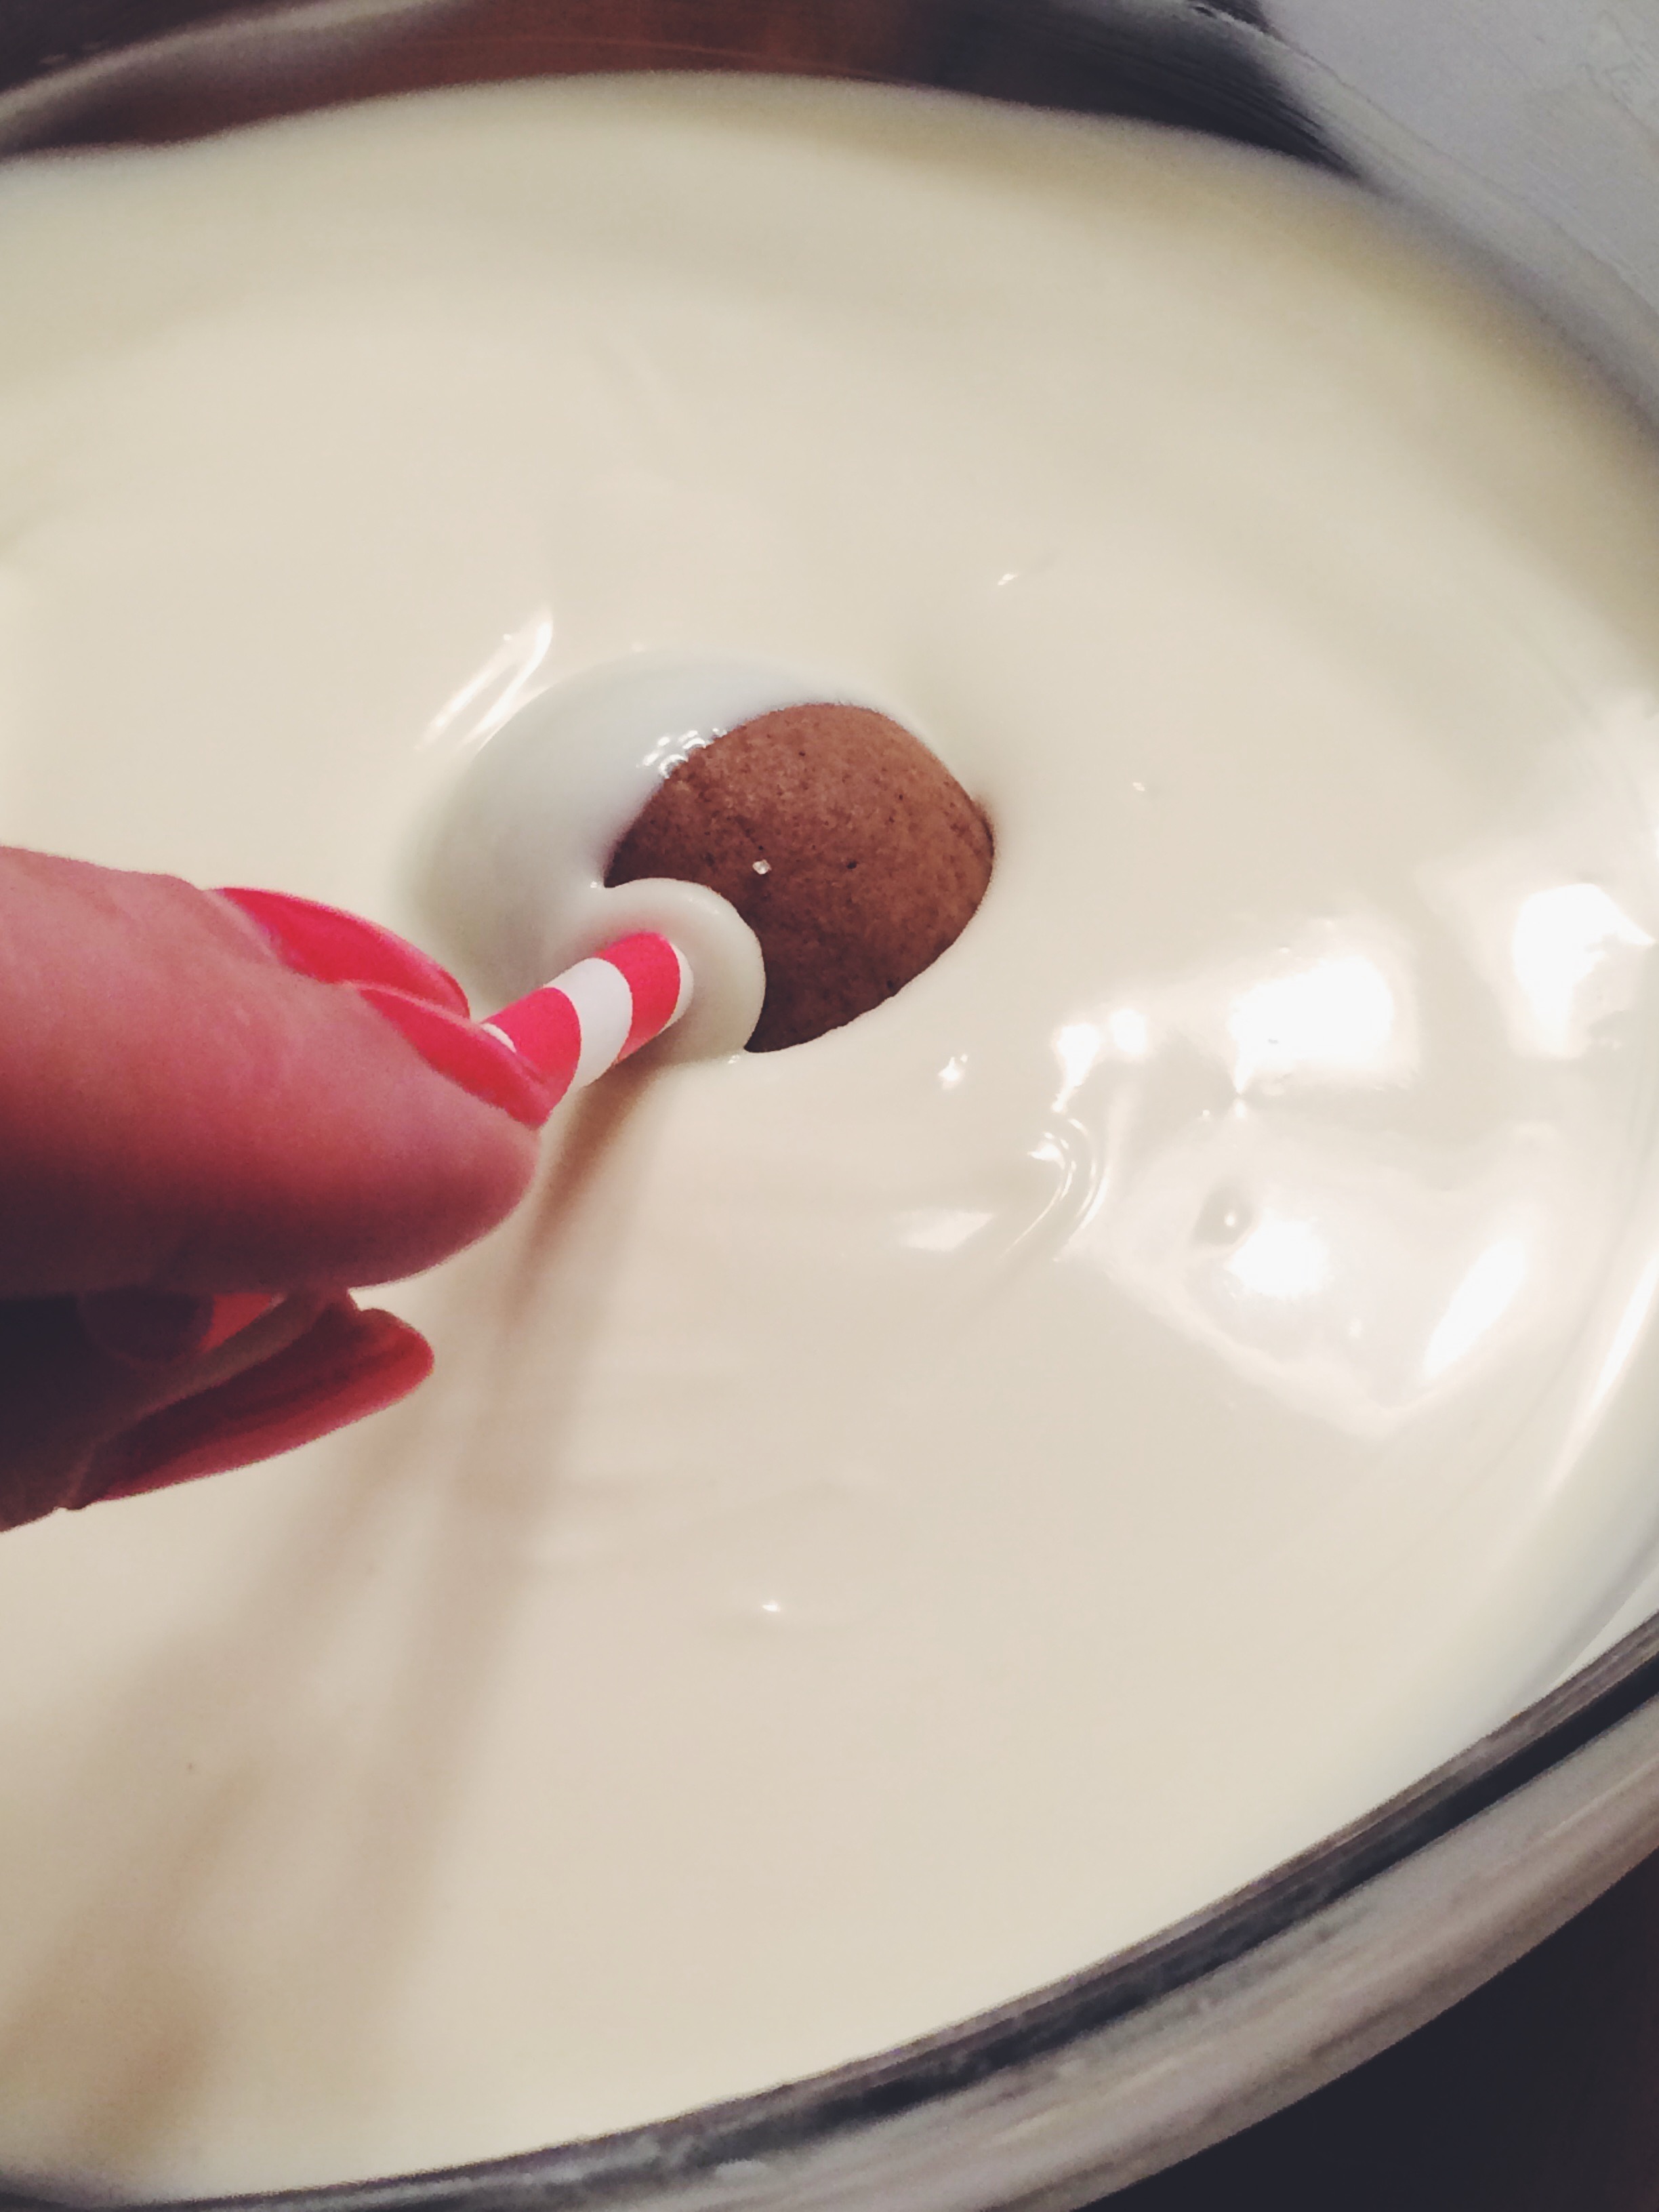
TIP: If you are using paper straws, cut them in half, then be sure to stick the cut/rough edge into the pop to hide it.
Dip the very end of your straw into the melted chocolate, then stick it into the cake pop, pushing it about half way through. Sit them aside on the cookie sheet until all pops have sticks.
TIP: The little circle of chocolate that is formed around the straw will actually make your life easier when you go to dip the pops, as you won't have to worry about getting the chocolate to cover all the way up to the stick.
Once you are done with this step, put the cookie sheet in the refrigerator for 10-15 minutes to chill the pops.


To melt the rest of your candy coating, add it to the bowl/measuring cup along with the already-melted coating. Stir together and microwave (again, 30 second increments, stirring in between, until it is smooth).
TIP: Depending on the brand of candy melts/white chocolate you use, the coating may be too thick for easy dipping. If this is the case, you can add vegetable shortening to thin it. In a small glass bowl, microwave 1 Tbsp shortening until it is melted. Add that to your melted chocolate and stir well to combine. I almost always do this step.
Remove the chilled cake pops from the refrigerator and get ready to dip! I always set up a little "dipping" station. When you dip the pops, you can return them to the same waxed paper covered tray that you chilled them on. Prep an extra tray with a sheet of waxed paper as well. Pour your sprinkles into a little bowl to make things easy.
Dip the side/bottom of the cake pop into the melted candy coating and pull it towards you until the coating reaches the edge of the stick. Repeat on all "sides" until the pop is fully coated.


Lightly (very lightly) tap the stick against the edge of the bowl and/or "shake" the pop to remove excess coating. Dab the bottom of the pop on your extra cookie sheet to remove extra coating from the bottom of the pop (this helps to avoid pooling around the base of the pop). Decorate the top with sprinkles of your choice while the coating is still wet, then place back on lined cookie sheet to set up!

Store in the refrigerator, or place in an airtight container and freeze until Christmas (which is what I did!).
TIP: If you do plan to freeze these, do not use the little colored nonpareil sprinkles (like these) as the colors are more likely to bleed together.